Showing posts with label compost bin. Show all posts

Wednesday, July 15, 2009

SUMMER BLOW OUT SALE AT COMPOSTERS.COM!


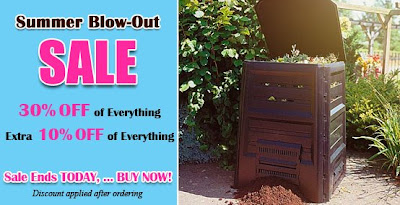
Summer Blow-Out Sale!
30% off of everything!
PLUS an extra 10% off merchandise today!
CLICK HERE for savings.

Friday, June 19, 2009

Why You Should Use Compost In Your Flower Bed

Compost Soil


The benefits of using compost in your beds instead of just soil include less waste, less weeds, healthier plants with less diseases, and less harmful chemicals that damage your plants in the long run. Each benefit will improve the quality and life of your plants, and in turn make your gardening experience more enjoyable.

  • Healthier Plants, Richer Flowers: Compost is made up of micro-organisms, worms, arthropods and humus, which provides soil with organic matter. It contains macro and micro nutrients, which are absent in chemical fertilizers. It neutralizes the soil, bringing pH levels to optimum range. It aerates the soil, and brings healthy bacteria, fungi, and insects to the soil. Composting also improves drainage, which is vital when growing flowers. It improves absorption and enhances soil quality. All of these are important for healthy plant growth. Your flowers will be richer and brighter, leaves a tad greener, and your garden friendlier to all kinds of organisms.

  • Stronger plants from your compost will be less susceptible to diseases and bugs: You will find it unnecessary to use toxic and harmful pesticides and fertilizers that do more harm than good to your plants and garden. The micro-organisms present in your compost are enough to protect from diseases and pests.

  • Compost means less weeds: Replacing soil with compost or mixing compost in your soil means less density, which makes it easy to pull out weeds, if any grow at all. Weeds are significantly less in compost than they are in bare dirt. The less time you spend weeding, the more time you have to plan out a beautiful spring, summer, or winter flower garden. You will have more attention for the plants themselves, rather than the weeds surrounding them.

  • Less Yard Waste: If you happen to make your own compost, then it means less organic waste from your kitchen and yard. You can make better use of your yard trimmings and fallen leaves. It is convenient to have your own compost so that you spend less time and money on trying to buy compost or fertilizer in the market. Also, when you have your own compost, you can monitor the ingredients, make sure that it is 100% organic, and tailor it to suit your own needs. You can use waste from the kitchen – vegetable and fruit skins, spent tea leaves, etc. to make your compost pile richer. Less waste means less trips taking out the garbage. Make sure you keep your compost pile or bin away from scavengers. Keep it covered to maintain moisture levels and keep out air. If you have a child, this is an excellent way to educate him or her in living sustainably, reducing waste, and caring for the environment.

compost in flower garden

Thursday, April 30, 2009

Composters.com - Earth Day Giveaway! Win a Kitchen Scrap Keeper of your choice!


Composters.com is giving away a free stainless steel, red ceramic or white ceramic compost kitchen scrap keeper that comes with a compost manual and compost reference guide!

Please visit the Composters Composting Blog for how to enter this awesome contest that will be running until May 15th!

Thursday, April 16, 2009

The Benefits of Using Commercial Compost Starters and Accelerators

Many people can be interested in starting a compost pile but aren’t exactly sure how something like that would work, if they have enough compost material for the pile to give good results or even what it takes to get something like this started. As such, many give up on even trying to make their compost pile, even though in reality, there’s nothing to it. If you are worried that the ingredients you add to your compost pile won’t be enough, you can always rely on compost starter and accelerator to lend you a much needed hand.


Some sources say that compost starter and accelerators aren’t necessary and that everyone should have everything they need for a good compost pile around their household, but truth be told, for one thing, not all organic substances tend to decompose at the same rate, and for another, throwing all sorts of organic materials into the pile in hopes it will help with the decomposing process can give way to toxins or unwanted materials to show up in your pile.


The secret behind a good compost pile is the equilibrium between the carbon and nitrogen content. While carbon can be found in pretty much any organic residue, such as leaves, grass and other compost materials, nitrogen can make itself scarce, and as such, some help is needed in order to get things moving and the decomposing process under way. A compost starter will usually contain the necessary nitrogen the compost needs in order to start working.


Depending on the contents of your compost pile, you might find that while some of the things you’ve thrown in there have no problem decomposing, other things, such as pine needles or pine cones might take a lot longer. By adding a compost accelerator you can get everything to decompose at a quicker rate and as such, you wouldn’t have different ingredients in various stages of decomposition floating around your compost pile, but rather a balanced, homogenous mass that is ready for use.


By using commercial compost accelerator and starters you are making sure that the ingredients you put into the compost pile are pure and of high quality. Any sort of replacements for the substances commercial accelerators contain, that you might find around the house are likely to contain other ingredients which would bring toxins or unwanted substances into your compost pile. Some are even likely to use food leftovers or animal litter as compost material, something that is extremely unsanitary as well as damaging for your compost pile.

Commercial compost starters and accelerators can help you create and maintain your compost pile in optimal conditions, making your work easier and the end result much better.

Monday, February 2, 2009

Composting In Small Spaces

One thing I’ve noticed on the Composting forums and elsewhere, are people saying they have a hard time composting due to space restraints because they have a small backyard or live in an apartment. There are actually products out there specifically for this, so that you can recycle those costly food wastes into something less destructive to our landfills, and therefore that much better for the environment (and your houseplants!).

The Pro Automatic Indoor Compost Bin is a fully functional, indoor composting system. It efficiently recycles your food wastes, coffee grounds, newspaper, pet waste and plant clippings, conveniently in your kitchen, without smell.

It is a powerful compost bin that can fit inside one of your cabinets and handles up to 120 lbs of food waste a month, 70% of which will vanish into thin air. You don’t even have to worry about stirring or aerating it and it has a vacation mode to reduce the energy it uses during periods of non-use.


Monday, January 19, 2009

Red Wriggler Recycling 101


Red Wriggler Recycling 101

If you have been searching for a way to exercise your “green” thumb jump into this fun and unique world of “vermiculture.” or “vermicompost” is an organic gardening process of natural composting using earthworms, known as the Red Wriggler (Eisenia fetida). The Wrigglers transform food scraps into rich compost and liquid fertilizer. It is the perfect hobby to support the “cradle-to-cradle” return of organic matter to its origin, mother earth.

It is also perfect for small spaces. The worms only need about 1 square foot of surface area to digest each pound of waste material generated per week. Supply your worms with a container, some bedding material, food scraps, and the worms do the rest.

They consume food scraps, hair, and dust reducing organic waste by 25% in about 60 days; and produce worm castings, which contain the richest form of fertilizer known to man. Concentrated worm castings are very potent fertilizers and must be mixed with potting soil or water to dilute the concentration. Worm castings promote higher than average growth in plants and are rich in phosphorus, nitrogen, and trace minerals.

To start your new worm venture you will need the following supplies:

· Compost Bin (DIY or commercially available)

· Compost Scrap Keeper (Holds food scraps, ceramic or stainless steel)

· Bedding Materials

· Food Scraps

· Worms (Red Wrigglers or Nigh Crawlers)

Compost Bins

You could make your own DIY worm compost bins but to keep things, clean, easy and well-organized, I would suggest investing in a commercially produced vermin-culture compost bin. They are well worth the money spent.

Vermiculture Compost Bins automatically separate food scraps from finished compost, and most-importantly, does not need to be emptied or restarted like some DIY bins. Some recommended vermin-culture compost bins include:

· The Expandable Worm Tower

· Worm Condo

· Worm Bungalow

· Down Under Farm Worm Compost Bin

· Pet Poo Converter and Worm Compost Bin

· Friendly Habitat Worm Compost Bin

· Advanced Biosafe BioSystem

Other helpful accessories to look for are worm bedding (good if you are new vermiculture), a compost scrap keeper (ceramic or stainless steel), soil moisture & pH meter, compressed coir fiber bricks (bedding) and the “Compost and Worm Reference Wheel”

Worms

Oh and of course, don’t forget the worms, Red Wrigglers or Red Worms (tolerate a wide range of environmental conditions) and/or Night Crawlers (feed on deeper parts of the bin) will do the job. A mixture of the two will create rich and abundant worm castings.

Bedding

After you have made or purchased a compost bin, you can fill it with bedding. The worms prefer a cool, moist, but well-ventilated, dark environment between 50 and 80 degrees. Worms shun light and are photophobic—they shun both sun and artificial light, burrowing as deep as they can to flee the light. Heat and sunlight will dehydrate the little Wrigglers and all you’ll end up are “fried” worms.

The bedding material can be peat moss, aged manure, sawdust, dried grass clippings, hay, garden loam, coir (coconut fiber), straw, damp newspaper, Hessian, cotton rags, aged horse/cow manure (fresh manure heats up) shredded cardboard, newspaper, grocery bags, and most types of shredded leaves. Oak and other highly acidic leaves are not recommended since these worms don't like an acidic environment. Stay clear of inked and glossy papers, since they contain toxic substances which can exterminate your Wrigglers.

Keep in mind the worms have a hearty appetite and will eat whatever is put in front of them, including the bedding.

Feeding

Worms will eat ½ their weight of food each day. Be careful to not overfeed your worms. Like you feed your family, only feed them once they have partly eaten their previous food. This means no desert before dinner. Worms lack teeth and prefer their food mashed, chopped or pureed.

Worms need a variety of foods, and greatly appreciate a well-rounded diet. Worms will happily consume fruit and vegetable scraps/peels (except citrus fruit, onion, garlic and chilies), tea bags/tea leaves, coffee grounds and filters, crushed eggshells, newspaper, cardboard, egg cartons and shredded/soaked pizza boxes, old flowers and small amounts of garden waste, pasta, rice, wet bread & cereal, hair and small amounts of dust from vacuum cleaner. Avoid onions, garlic, citrus, dairy products, seafood, meat, oil, and pet droppings, or the wrigglers will run for the hills.

Worms

The Red Wrigglers are the hardiest, fastest reproducers of the vermin culture world they efficiently gobble up waste and create worm castings. Well-fed worms reproduce even faster, at an alarming rate. They double there population in 3-4 months. Young red worms are a shade of white but turn red at maturity.

Harvesting Worm Castings

Harvesting the compost is easy, just push the bedding and worms to one end of the box and fill the other end with fresh bedding and table scraps. Within a few weeks, the worms will munch their way over to the fresh food and you can scoop out the compost from the deserted side of the bin.

With commercial vermi culture compost bins, the work is done for you; just collect worm casts from the bottom trays, and fill the top trays with food.

If you find that cultivating worms and worm castings are not your thing, you could always take the day off and hang a sign on the worm bin that says “Gone Fishin!”


----------------
Now playing: The Mountain Goats - Blueberry Frost
via FoxyTunes

Monday, December 15, 2008

25 Great Composting Tips

Composting101.com provides a great resource for someone just getting into composting or seasoned pros looking for new ideas.

Here are their top 25 composting tips:

1. Grass clippings add necessary nitrogen to a compost pile, but be sure to mix with the "brown" materials that add carbon. Both are necessary for quick decomposition and rich compost. Piles made up of just grass will compact, slow down and start to stink.

(See Composters.com, Organic Compost Maker and Ultra-Concentrated Liquid Compost Accelerator)

2. Do not compost fats, pet droppings, or animal products. They will attract pests to the pile and can spread disease.

(See, Composters Pet Waste Products for easy disposal solutions.)

3. Newspaper or plain white paper from the computer is excellent for composting - just remember to shred it first to speed up the process.

4. Got compost? When finished it should look, feel and smell like rich, dark soil. You should not be able to recognize any of the items you put in there.

5. Worms love coffee grounds!

(See, extensive collection of red worms and vermiculture supplies.)

6. If adding ashes to your compost bin, do so sparingly. They are alkaline and affect the pH of the pile. In contrast, acidic materials include pine needles and oak leaves.

7. Plants that have been treated with pesticides and/or herbicides (weeds and lawn clippings) should be avoided.

8. The microbes responsible for breaking down your compost pile need a balance of nitrogen and carbon. Nitrogen comes from green materials such as food scraps, manure, and grass clippings. Carbon comes from brown materials such as dead leaves, hay, wood chips and shredded newspaper. A ratio that contains equal portions of both and is well mixed works best.

9. Algae and seaweed make excellent additions to your compost pile. Be sure to rinse off any salts before using.

10. Finished compost is usually less than half the volume of the materials you started with, but it's much denser.

11. Keep your compost pile in a black plastic bin and in direct sunlight to continue the composting process through the winter. Hay bales can be used to further insulate the pile.

(See compost bins and accessories)

12. Wooden pallets make excellent compost bins. Start with one pallet on the ground. Drive two metal stakes into each side. Slide additional pallets over each support and you have a bin ready for compost.

(See compost corral corners)

13. Straw is an excellent source of carbon for your compost pile. However, it may contain weed seeds, so make sure the pile is "cooking" properly.

14. Compost decomposes fastest between 120 and 160 degrees F. Decomposition will occur at lower temperatures, but it takes much longer.

(See Green Johanna Hot Komposter, for composting in colder climates)

15. The perfect size for a compost pile is one that is at least 3' x 3' x 3'. It's not only a manageable size to turn, but it's ideal for retaining heat while still allowing air flow.

(See, heavy duty pitch fork for compost aeration.)

16. For faster composting keep your pile or compost bin in direct sun.

17. Don't throw away your kitchen waste in the winter - try an indoor composter.

(See kitchen scrap mini- indoor compost bins, in green plastic, stainless steele, or white porcelain.

18. Compost piles should remain damp but not too wet. As you build your compost pile, make sure that each layer is moist as it is added. The surface should also remain damp (think of a wrung out sponge), especially during the summer months.

19. Does your compost pile smell? It's probably due to a large number of anaerobic microbes, which are working hard to break down your compost, but creating a smelly situation in the process. To cut down on the anaerobic process, aerate your pile regularly, creating air spaces and limiting the anaerobic microbes while stimulating the less stinky aerobic microbes.
(See Metal Pile Turner and Aerator for additional compost bin aeration)

20. Help start a new compost pile with aged manure, cottonseed meal, alfalfa meal, blood meal, or compost starter. They are rich in nitrogen and help jump-start the microbes responsible for breaking down organic matter into compost.

21. Anything that was living at one time is great for compost bins. Think of leaves, vegetables, and grass clippings.

22. Compost piles can either be layered - thin layers of alternating greens and browns, or they can all be thrown in together and mixed well. Either way works!

23. Soak finished compost in water to "brew" compost "tea," a nutrient-rich liquid that can be used for foliar feeding or for watering plants in your garden, backyard, or houseplants.

24. Apply finished compost to your garden about 2-4 weeks before you plant, giving the compost time to integrate and stabilize within the soil. Click here for a guide to vegetable gardening.

25. For faster results, use a compost turner every two weeks to aerate your pile.
(See variety of compost tumblers to best suit your needs.)

via - Composting101.com